How to Create a Rhinestone Ombre Effect (That Actually Looks Professional)
Have you ever seen a rhinestone project that seems to glow from across the room? That's the magic of a well-done rhinestone ombre. The gradual color fade creates depth and dimension that makes any piece look intentional and polished. Whether you're working on drinkware, apparel, accessories, or home décor, the same simple principles apply. You don't need to be an advanced crafter to pull this off. Here's everything you need to know.

START WITH COLORS THAT BLEND BEAUTIFULLY
The foundation of a great rhinestone ombre starts with color selection. You want shades that flow into each other naturally. Think of it like a sunset: colors shift gradually, with no harsh line where one ends and another begins.
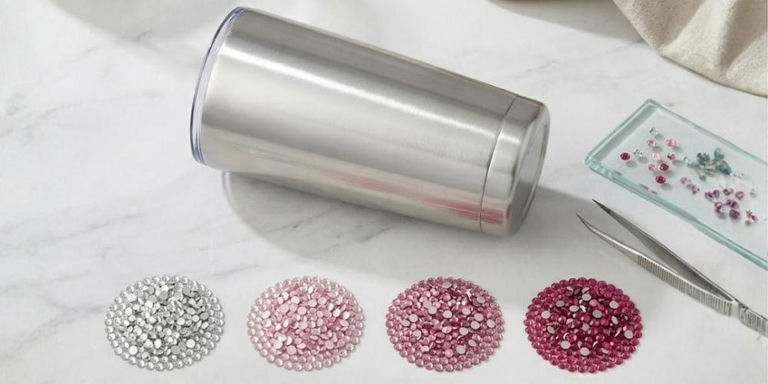
Some combinations that work beautifully every time:
- Crystal to silver
- Rose pink to crystal
- Sapphire blue to aqua
- Black diamond to silver
- Champagne gold to crystal
You can keep it simple with two shades for a subtle fade. Or layer multiple colors for something more dramatic. Browse our full rhinestone catalog to explore all the color options available.
THE COLOR FAMILY RULE
Staying within the same color family almost always gives you the smoothest transition. When in doubt, pull shades from the same row of your color chart. This one habit makes a noticeable difference in how polished the finished piece looks.
Start with your darkest shade at the base. This creates visual weight that helps the whole design feel balanced. Your lightest color floats toward the top, which draws the eye upward and gives the piece a lifted, dimensional look.
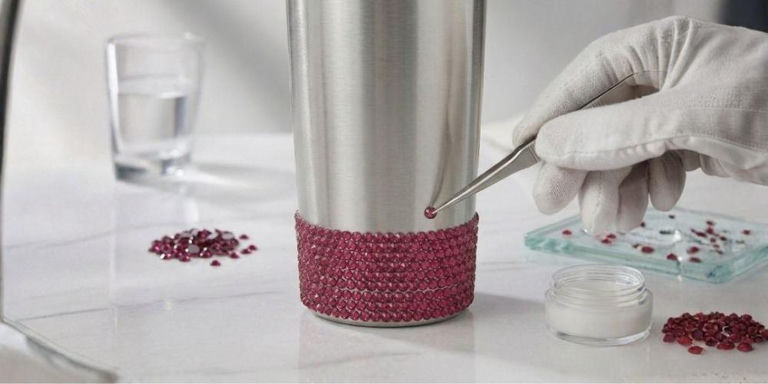
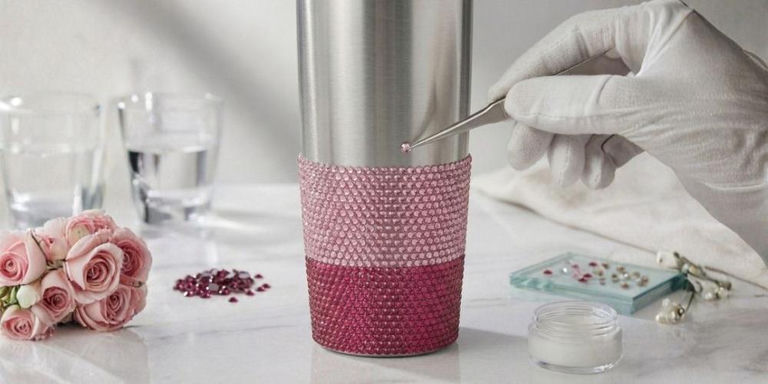
Get your darkest rhinestones down first and build that section out fully. This is your anchor. Once it feels dense and complete, start introducing your second color gradually. Don't create a hard line between the two.
The key move is overlap. Let a few stones from each color mix right where the transition happens. That overlap is what turns a two-color design into a true color gradient.
INSIDER TIP: PLACE STONES WITH PRECISION
When placing individual stones, our Rhinestone Picking Pencil makes it easy to set each one exactly where you want it. No fumbling, no misplaced stones. In my experience, this tool alone makes detailed gradient work feel much less stressful.
WORK IN SECTIONS FOR A SMOOTHER COLOR FLOW
Trying to complete the whole design in one pass is where most ombre projects go sideways. Instead, break the piece into sections. Complete one area before moving to the next.
This gives you more control over the blend. It's easier to catch an uneven patch when you're only focused on one zone at a time. Stepping back between sections lets you check the flow before it's too late to fix.
WHAT WORKS:
- Complete one section fully before moving on
- Step back often to check balance
- Rotate the piece to view from all angles
- Mark light pencil guidelines before you start
HAVING TROUBLE WITH UNEVEN SECTIONS?
This usually happens when the transition zone isn't defined clearly enough. Try drawing a faint pencil line where you want the blend to start. It gives you a reference point without locking you into a hard edge.
KEEP YOUR SPACING SMOOTH AND CONSISTENT
Even with the right colors, inconsistent spacing can make an ombre look scattered. This is what separates a project that looks almost right from one that looks really right.
Keep these spacing tips in mind as you work:
- Maintain similar distances between stones throughout the piece
- Don't overcrowd any single section
- Reduce stone density slowly as the color lightens
- Check balance from about three feet away every few minutes
The fade should feel soft and seamless. The color should look like it's dissolving, not stopping. You've got this.
QUICK SPACING CHECKLIST:
- ✨ Even gaps between stones in every section
- ✨ Density decreases as color lightens
- ✨ Overlap zone is soft, not sharply divided
- ✨ No crowding in the darkest base section
- ✨ Piece rotated and checked from multiple angles
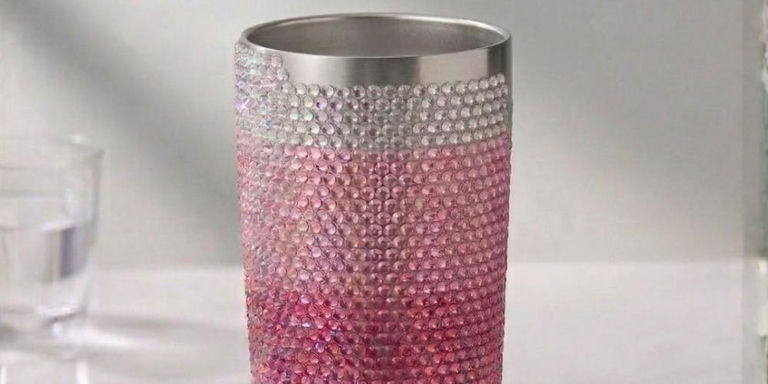
FINISHING TOUCHES THAT MAKE YOUR OMBRE LOOK PROFESSIONAL
Once all your rhinestones are placed, step back and look at the full piece from a distance. The fade should feel fluid, with no obvious stopping points between shades.
If one section looks too heavy, remove a few stones and spread them out. If the transition feels too sharp, add a few scattered stones from the neighboring color to soften it. These small adjustments make a big visual difference.
A great rhinestone ombre doesn't just catch light. It moves with it.
A well-done rhinestone ombre has movement. It draws the eye. When the light hits it at the right angle, the effect is genuinely striking. Take your time on the finishing pass. It's worth it!
Commentaires
Laisser un commentaire